


How to Set Up Google Ads for Photographers: A Step-by-Step Guide
This post may contain affiliate links which means I may receive a commission for purchases made through links.
I only recommend products that I have personally used long term. Learn more on my Privacy Policy page.
Google Ads has been my saving grace for bringing in new photography clients. It’s an amazing tool for anyone looking for more clients quickly. I’ve been working on SEO for my website, but it’s a long-term game and takes some time to establish, while Google Ads can speed up the process and help you start getting inquiries much sooner.
I’ve gotta admit, starting Google Ads when you have no idea what you’re doing can be overwhelming; at least for me, it was. Now that I’ve gotten the hang of it, I’m obsessed. It took a lot of trial and error to really understand how it all worked, but once I figured it out, it did the heavy lifting of bringing in new photography clients.
Learning how to set it up correctly is mandatory! When I first started with ads, I wasted $50 in 24 hours, and it was soul-crushing. There wasn’t much information on how to set up Google Ads for wedding photographers, so I created this guide for anyone who was in the same boat as I was. I’ll walk you through setting up your campaign, choosing keywords, figuring out your budget, and avoiding some of the mistakes I made along the way. These steps can work for any type of photographer or service-based business.
Need Help With Google Ads?
Rather have someone set up your Google Ads for you? I offer Google Ads setup and support for small businesses.
Want to figure it out yourself? Join my free Facebook group to ask questions, share tips, and learn from other small-business owners.
How do Google Ads work?
Paying for Google Ads gets your website to show up when someone searches for your service or keyword. You’ll typically see these at the top of Google with a “Sponsored” label. The websites below the sponsored results are ranking organically through SEO.
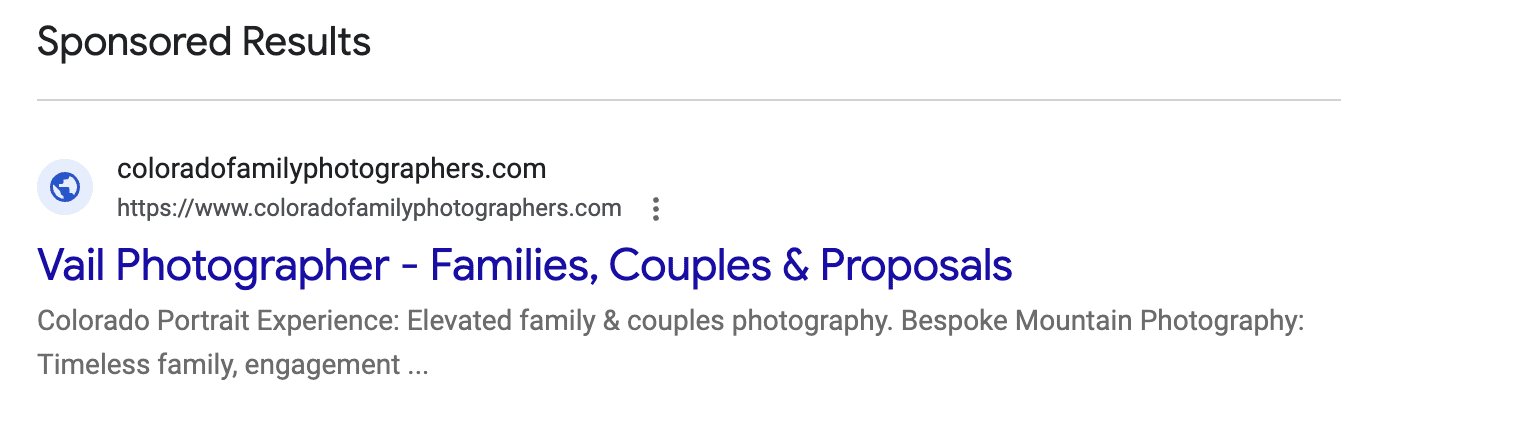
Google Ads works like an auction, where you’re bidding against other people running Google Ads for your website to show up. Google decides which ads show based on your bid, the quality of your ad, and a few other factors. With Google Search ads, you only pay when someone clicks on your ad.
Before getting started: your website matters
First things first, having a good website is crucial! People might click on your ads, but if your website isn’t appealing, links don’t work or doesn’t showcase your work well, they’re less likely to book. Make sure your website is ready before spending money on Google Ads.
I also recommend setting up your Google Business Profile and getting some reviews so potential clients can see that you’re a trustworthy business.
How Much Should Photographers Spend on Google Ads?
Most advice you’ll see online will tell you to spend thousands, but that wasn’t realistic for me. Obviously, the higher your budget, the more potential you have for clicks and hopefully more clients. But you don’t need to spend a ton of money to get started!
I started with just $10 a day, which comes out to about $300 a month. You absolutely don’t need to start with a huge budget!
If you have more to spend, $25–$50 a day can be a great budget to work with. That’s around $750–$1,500 a month, and depending on your location and how competitive your keywords are, it can give you a good amount of traffic to work with.
But it really comes down to what you’re comfortable spending. I’d rather start with a smaller budget, see what’s working, and increase it from there than spend a bunch of money without knowing what’s bringing in clients.
How to Find Keywords for Photographers
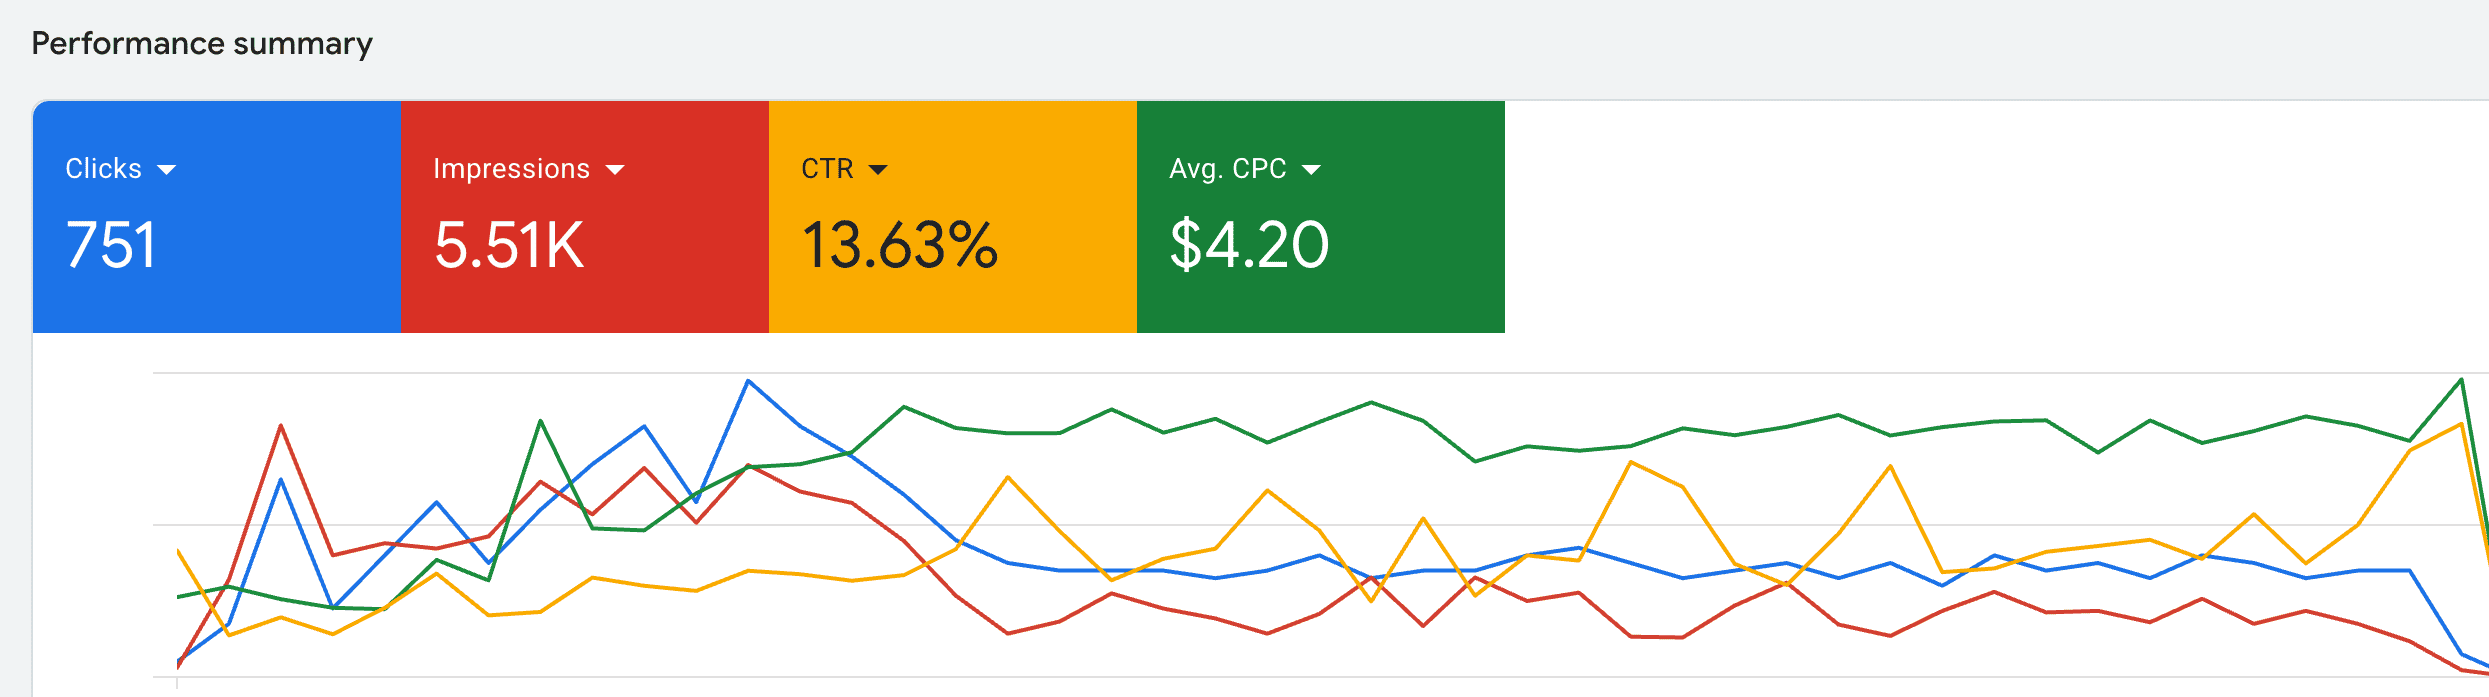
Keywords are the words or phrases you choose to help your ads show up when someone searches for your services on Google. Choosing the right ones is such an important step to setting up your ads. You want to use keywords that people are actually searching for in your area.
Start with your service and location. I would stay away from super broad terms like “wedding photographer” and focus on something more specific, like “Asheville wedding photographer.”
Here are a few examples of keywords you could use for different types of photography:
- Wedding photography: Asheville wedding photographer
- Family photography: Denver family photographer
- Maternity photography: Raleigh maternity photographer
- Elopement photography: Colorado elopement photographer
Something else to consider is how far you’re willing to travel for sessions. For example, “Colorado family photographer” is a lot broader than “Denver family photographer.” And if you’re targeting “Colorado elopement photographer,” you could be getting inquiries from couples getting married all over the state, while “Aspen elopement photographer” is much more specific.
I’d recommend researching both broader and more specific locations, depending on where you actually want to book clients. Just because you’re willing to travel somewhere doesn’t necessarily mean you want to pay for clicks from every location!
You’ll also want to make sure people are actually searching for the keywords you choose. Google Ads will let you know when a keyword has very little search traffic, and you may see a “Low search volume” status.
Once your research is done, you can use these keywords in your Google Ads, but also on your website for better SEO. Your short-term goal may be to pay for Google Ads, but your long-term goal may be to rank on the first page of Google organically (and for free!).
Tools for Keyword Research
There are a few tools that can help you find the right keywords for your Google Ads. You don’t need to spend a ton of money on keyword research, but having an idea of how many people are searching for something and how much those clicks might cost is really helpful.
Google Keyword Planner: This is a free tool built into Google Ads that helps you find keywords, check search volume, and estimate advertising costs.
Keywords Everywhere: This is one of my favorite tools for keyword research! It’s a browser extension that shows you search volume, related keywords, and estimated cost per click right in Google. I use it all the time, and it’s pretty affordable.

Keysearch: If you’re also working on your website’s SEO, Keysearch is worth checking out. It goes a little deeper into keyword research, competitor analysis, and finding keywords you have a better chance of ranking for organically.
How to Set Up Google Ads for Photographers
First things first, you’ll want to sign up for your Google Ads account! I also like to have Google Search Console and Google Analytics set up so I can see where my website traffic is coming from, what’s already working, and start collecting data. The earlier you get these set up, the more data you’ll have to work with!
Campaigns: How to Structure Your Google Ads
There are SO many ways to structure Google Ads, so take a minute to write down your services and the areas you want to target.
We’re going to start with a bit of Google Ads lingo, so stick with me! I like to think of campaigns as the foundation of a home. Your campaigns control things like your budget, locations, and how Google spends your money.
For example, if you’re photographing weddings in both North Carolina and Colorado, you might want a separate campaign for each location.
I currently only have one campaign, which is my main “hub.” In the past, I had a few different campaigns, including one for North Carolina and another for Colorado when I was going back and forth between locations.
Something important to know is that your budget is set at the campaign level. So if you want to spend more money advertising weddings and a little less on family photography, I’d recommend creating two separate campaigns.
I don’t need a separate budget for each service, so I keep everything under one campaign and then break up my services into different ad groups. We’ll get into those next!
Create Your Google Ads Campaign
1. Create a new campaign
In Google Ads, select “New Campaign.”
2. Select your campaign goal
I personally like choosing “Create a campaign without goal guidance.” You can also choose something like “Leads” or “Website Traffic,” but I prefer setting things up myself rather than following Google’s recommendations.
3. Select your campaign type
You’ll want to choose a Search campaign. These are the ads that show up when someone searches for something on Google, which is exactly what we’re trying to do!
I recommend leaving both Google Search partners and Display Network unchecked.
- Google Search partners: These are additional websites and search experiences where your ads can show up. They can bring in more traffic, but I prefer sticking to Google’s own search results.
- Display Network: These ads can show up on websites and apps while people are browsing, even when they’re not actively searching for a photographer. They can be useful for certain businesses, but I personally leave this off.
4. Choose the locations you want to target
This is an important one, especially if you’re photographing in a destination area!
When I was photographing weddings in Breckenridge, Colorado, I targeted a much larger area because people were traveling from all over the US and even other countries to get married there. I didn’t want to limit my ads to people who were physically in Colorado.
You’ll see two different options for location targeting:
- Presence or interest: People who are in your targeted locations OR have shown interest in them. This can help you reach people researching a destination before traveling there.
- Presence: People who are physically in or regularly in your targeted locations.
Think about where your clients are searching from, not just where you’re located.
And this doesn’t just apply to wedding photographers! When I was photographing families in Breckenridge, plenty of them were visiting on vacation. Even though I was photographing sessions locally, my clients weren’t necessarily locals.
If you’re specifically trying to book local clients rather than people traveling to your area, that’s when I’d consider targeting a smaller area and using the Presence option. Just know that this can still include tourists who are already visiting.
Also, remember that your location settings and keywords work together. If you’re targeting a large area, I’d still use specific keywords like “Breckenridge wedding photographer” rather than something broad like “wedding photographer.”
5. Set your budget
This is where you’ll choose how much you’re comfortable spending each day. As I mentioned earlier, I started with $10 a day, or about $300 a month.
6. Choose your bidding strategy
This is basically how you tell Google to spend your money. There are a few different options, but here are three worth knowing about:
- Maximize Clicks: Google tries to get you as many clicks as possible within your budget. This can be a good starting point if you’re brand new to Google Ads.
- Manual CPC: You choose how much you’re willing to bid for a click. This gives you more control, but you’ll need to keep an eye on things.
- Maximize Conversions: Instead of focusing on clicks, Google tries to get you more inquiries or other actions you’ve set up to track.
I personally prefer Manual CPC because I like having more control over how much I’m willing to spend on clicks. But if you’re just getting started, Maximize Clicks is a reasonable option. You can also set a maximum CPC bid limit so Google isn’t bidding more than you’re comfortable with.
Once you have conversion tracking set up and know your data is accurate, you can consider Maximize Conversions.
7. Set your ad schedule
I don’t set a schedule for when I want my ads to run. Some businesses only run ads during certain hours, but since I photograph in destination areas, people are searching from different time zones.
I want them to be able to find my website whenever they’re looking!
Set Up Your Ad Groups
Next up are ad groups! These are basically how you organize the different services within your campaign.
For example, you can have one campaign with separate ad groups for weddings, families, engagements, and elopements.
1. Name your ad groups
I like having a separate ad group for each service I offer. That way, I can use different keywords and write ads specifically for what someone is searching for.
If someone is searching for family photos, I want them to see an ad about family photography, not weddings.
2. Add your keywords
Now we’ll go back to the keywords you researched earlier!
There are three different ways to add keywords in Google Ads: exact match, phrase match, and broad match. These tell Google how closely someone’s search needs to relate to your keyword before your ad can show up.
Here’s the difference:
- Exact match: The most specific option. Your ad can show up for searches with the same meaning or intent as your keyword.
- Phrase match: Gives Google a little more flexibility to show your ad for related searches that include the meaning of your keyword.
- Broad match: Gives Google the most flexibility and can show your ad for a much wider range of searches.
Here’s what that looks like when adding keywords:
[Santa Barbara photographer]— Exact match"Santa Barbara photographer"— Phrase matchSanta Barbara photographer— Broad match
I personally stick with exact match and phrase match. I’ve found broad match can be a little too general, especially when you’re working with a smaller budget.
One thing I’ve noticed with phrase match is that Google sometimes shows my ads when people search for other photographers by name. That’s not necessarily someone I want to pay for!
That’s why I recommend checking your Search Terms report, which shows the searches that have triggered your ads. You can also add negative keywords to help prevent your ads from showing up for searches you don’t want.
We’ll get into that a little more once your ads are running.
Create Your Google Ads
1. Add your headlines
You’ll have the option to add up to 15 headlines to your ad. These are the short lines of text that show up in your Google ad.
I like using specific terms like my location + photography service, along with a few details about my business.
For example, if you’re advertising family photography in Denver, you might use:
- Denver Family Photographer
- Documentary Family Photography
- Family Photos in Denver
- Candid Family Photo Sessions
- View My Family Portfolio
- Book Your Family Session
You can also include a call to action like “View My Portfolio” or “Get in Touch.”
One thing I’ve learned is that you don’t necessarily need to fill all 15 headlines. Google recommends adding a variety of headlines and may give your ad an “Average” or “Poor” Ad Strength rating if you don’t add enough.
I personally prefer fewer, more specific headlines rather than adding a bunch of repetitive ones just to fill the space. At the end of the day, I care more about whether my ads are bringing in clients than getting a perfect Ad Strength score.
Once your ads have been running, you can see what’s working and make changes from there.
2. Add your descriptions
Here you’ll have a little more room to explain your services. I like keeping these straightforward and including a call to action so people know what to do next.
3. Add your ad assets
I recommend adding sitelinks, which are extra links that can show up underneath your ad.
For photographers, I’d consider linking to:
- Contact
- About
- Portfolio
- Reviews or Testimonials
These give people a few different ways to explore your website without having to start on your homepage.
4. Choose your landing page
This is the page people will visit when they click on your ad.
I’d recommend sending them directly to the service they’re searching for. For example, if someone searches for a family photographer, send them to your family photography page rather than your homepage.
You want to make it as easy as possible for people to find what they’re looking for!
5. Set up conversion tracking
This is something I wish more people did before spending money on Google Ads!
Getting clicks to your website is great, but what you really want to know is whether those clicks are turning into inquiries.
One way to track this is by creating a thank-you page on your website.
When someone fills out your contact form, you can have them automatically redirected to a thank-you page. Then, you can set up a conversion in Google Ads to track when someone reaches that page after clicking your ad.
You’ll still need to connect the tracking through Google Ads or Google Analytics, but having a thank-you page makes this much easier.
Just make sure people only reach that page after successfully submitting your contact form.
6. Review and publish
Before publishing, double-check your keywords, location settings, budget, headlines, and website links.
And that’s it! Your Google Ads campaign is ready to go.
But don’t just set it and forget it. Once your campaign is running, you’ll want to check what people are searching for, how much you’re spending, and whether those clicks are actually bringing in clients.
Facebook Ads vs. Google Ads for Photographers
The amazing thing about Google Ads is that people are already searching for your services, which means they’re usually a lot closer to booking. Someone searching for “Breckenridge wedding photographer” is probably looking to hire someone, not just browsing.
Facebook and Instagram Ads work a little differently. You’re putting your business in front of people who might not even be looking for a photographer yet. They’re also great for promoting mini sessions or showing your ads again to people who’ve already visited your website.
Personally, I prefer Google Ads because I want to reach people who are already looking for what I offer. I find that these people are more likely to inquire sooner, whereas Facebook and Instagram Ads are more of an introduction to your business.
Both can work, but I think Google Ads is the better place to start if your goal is to book more photography clients.
Need Help With Your Google Ads?
Already running Google Ads but not sure they’re set up correctly? Or just getting started and would rather have someone do it for you?
I offer Google Ads setup and optimization for photographers and small businesses. Whether you need a campaign built from scratch or want someone to go into your existing account and make improvements, I can help.
Check Out My Google Ads Services
More Resources for Photographers
If you’re working on growing your photography business, here are a few more resources that might be helpful!

Hi! I'm Kelsey!
I'm a photographer and small business owner who moved back home to coastal North Carolina after 13 years in the Colorado mountains.
Over the years, I've photographed hundreds of weddings, explored countless mountain towns, and discovered some pretty incredible places along the way.
I love sharing my favorite travel recommendations, photography tips, and what I've learned from running my own creative business.



@greenhousecreativestudios


We may use cookies to better your experience. Scrolling this website confirms that you have read and agreed to our privacy policy and terms of use
©2026 Greenhouse Creative Studios
close x